Dry brush painting furniture is a fun and simple furniture painting technique that adds dimension, color and interest to your furniture! By layering paint vertically we transformed an old desk into an amazing piece of art!
In this tutorial, you'll learn a variety of layering and dry brushing paint techniques so you can tap into your creativity and imagine up your own works of furniture art!
WHAT IS DRY BRUSHING WITH PAINT?
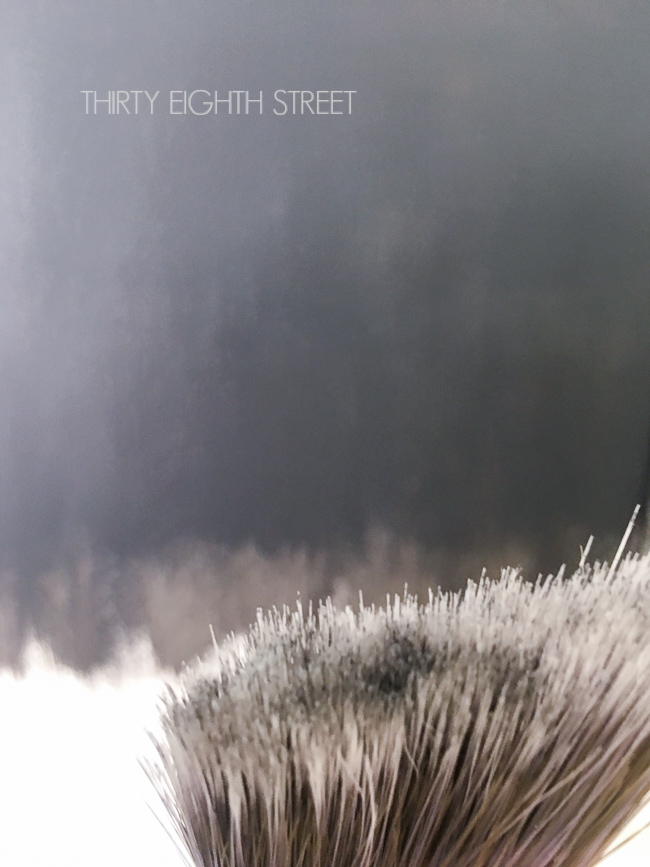
When you use minimal paint on your brush and apply light pressure, the dry brush effect leaves a light and scratchy brush stroke that resembles texture.
Dry brush painting is a furniture painting technique that you typically apply right before you seal your project.
Dry brushing adds interest and highlights the gorgeous details of a piece.
The reason I LOVE dry brushing the most is because the process goes so quickly! But be prepared. Your friends and family are going to think it took you hours to create your finish!
Do you tell them or keep that to yourself, ... that's up to you! ;)
Disclaimer: This post contains affiliate links to products I love and use everyday. You can view our full disclosure here.
HOW DO YOU DRY BRUSH PAINT FURNITURE?
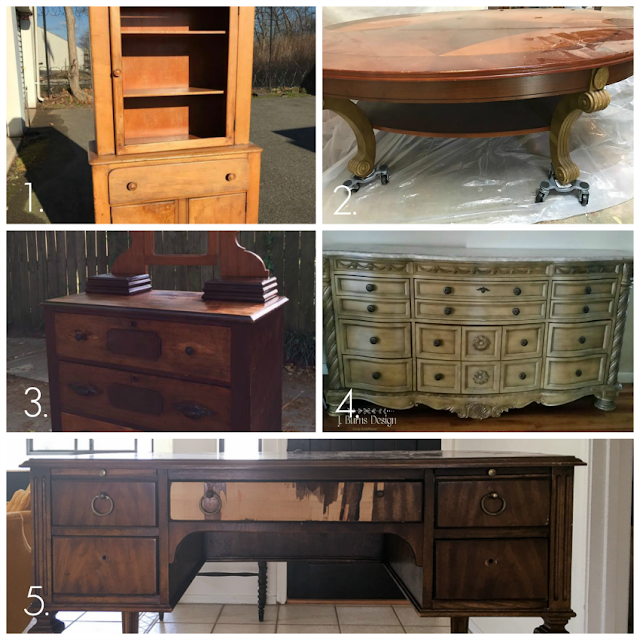
But first, here are a few examples of dry brushed furniture that we completed using a variety of different dry brushing techniques.
In all of these furniture painting tutorials, there are a few similarities:
- Dip your paint brush lightly into your paint. Tip! If you slowly tip your paint can (with the lid on) from top to bottom you'll not only give your paint can a good mix, you'll get paint onto the backside of your paint lid. Once you take the lid off, the underside becomes the perfect surface for dipping your paint brush when dry brushing.
- Wipe off your excess paint onto a paper towel. You can view a short video at the end of our Revamped Media Console Makeover post if you're interested to see how we do this.
- Apply light pressure. After you've wiped off your excess paint, lightly brush your paint brush against your raised areas or the flat surfaces of your project. It should feel like you're feathering out your paint color. Tip! If you're feeling nervous, practice applying light pressure on your furniture piece without any paint on your brush. You'll be a pro in no time!
Now, that we've explained what dry brush painting is and you've seen a few examples of how it can be used, I want to show you what dry brushing looks like when you apply it vertically!
We're calling this fun furniture makeover, The Carter Desk Project.
A friend of mine texted me a picture of this desk they were getting rid of and asked if I was interested in doing something with it.
I was happy to take it off of their hands. I think I was the most excited over those round pulls!
Lucky for me, enough of the round pulls were tucked away in drawers.
Before, I could update the desk, I would need to remove the old veneer, come up with a design plan and find two replacement drawer pulls for the front middle drawer.
Removing the old veneer was a cinch with my HomeRight Digital Heat Gun.
I found two pulls that had a similar patina in my hardware stash and my design idea was simple. Make the desk look like a piece of art.
How in the world could I accomplish that? I attempted to take a drawing class in high school, however after the semester was over I learned (in the nicest self affirmation way) that "I wasn't good at drawing."
Maybe I should lean towards abstract then?... Yep, abstract it is! Stepping out of my comfort zone, I was about to try something new... dry brushing... vertical style... on furniture... abstractly.
STEP BY STEP INSTRUCTIONS FOR VERTICAL DRY BRUSHING FURNITURE ART
1. Select two paint colors. For this desk makeover, I used General Finishes in Lamp Black and Snow White.
2. Paint your lowest paint color first. This is the paint color that you'll be dry brushing over. For me, that color was Snow White. Give yourself a visual line to follow and then paint your lower paint color above that line a good 2 1/2 inches.
3. Paint the upper paint color. This is the color that you'll be using to dry brush with. For this project, this was Lamp Black. Start at the very top of your furniture piece and stop your upper paint color just below the line of your lower paint color so that you give yourself enough distance to drag your paint brush down during the dry brushing step.
4. Blending/Dry Brushing. Blending first. The 2 1/2" gap is too big of a gap to go from a solid color line directly to dry brushing. You need an area in between these two areas to create a nice blended look. The goal for this blended area is to NOT create another solid horizontal line but rather to create an uneven line with your vertical paint strokes.
Load up your paint brush with a little bit of the upper paint color (not dripping) then starting your paint brush roughly from about 2 inches above where your upper paint color ends. Then, drag your paint brush in a downward motion for 3- 3-1/2 inches, varying the distance as you paint around your piece. This gave me a nice blended "grey" tone" and a nice jagged edge to work when it came time to dry brush.
Next, dry brushing. I used this paint brush for this vertical dry brush painting technique. Per our dry brush definition above, you'll dip your paint brush into the paint ever so slightly and then rub off the excess onto a paper towel. Using the thin side of your paint brush, start your brush just above your jagged blended edge and with light pressure pull your paint brush downward using a quick, light stroke. You can see how this is done in our video demonstration at the end of our post!
Erring on the lighter side is ideal because you can always repeat the process again to get the desired coverage. It's always easier to add more than it is to take away. As you dry brush, your blended area will also receive a little more coverage and that's okay! It helps give some nice flow to your abstract messy jagged masterpiece.
After sealing my work with General Finishes Top Coat, I had this to show for my art work! You can watch our step by step guide come to life with our 2 minute video demonstration which can be found at the end of this post!
DRY BRUSH PAINTING VIDEO TUTORIAL
Would you like to see a hands on demonstration of vertical dry brushing?
Check out our short 2 minute video directly below and watch us in action!
Whether you love our abstract desk makeover or not, I hope you've been inspired to stretch yourself to try something new!
If you have friends that would enjoy this tutorial and painted desk makeover, please share it on Pinterest or Facebook!
For additional furniture painting tutorials like this one check out our Natural Furniture Distressing Technique, our Balayage Inspired DIY Painted Media Console Makeover
Or click here to see our Furniture Tutorials & Resource Page for LOTS more furniture refinishing how to's and painted furniture ideas!
MORE FURNITURE PAINTING TECHNIQUES
Want to learn more furniture painting techniques? Click on any of the links below to see additional advanced furniture painting technique tutorials.
- How To Create A Faux Restoration Hardware Finish With Dry Brushing
- Layering Chalk Paint, Color Blending & Dry Brush Painting Tips!
- Dry Brushing Furniture Using Metallic Cream
- DIY Painted Picture Frames
- Bold Painted Mirror Makeover With Chalk Paint®
Do you love a good furniture makeover? Me too! Check out and see what my DIY Furniture Refinishing friends decided to do with these outdated furniture finds!
1. How to Get A Shabby Chic Cabinet From an Old Worn Out Cupboard by Just The Woods
2. Coffee Table Makeover Using Some of my Favorite Brands by Lynn Fern
3. How to Paint and Shade with Pure and Original Classico Paint by That Sweet Tea Life
4. Buffet Makeover by J. Burns Design
5. How To Dry Brush Paint To Make Furniture Look Like Art by Thirty Eighth Street
If you have any questions about dry brushing, leave us a comment below and we'll try to answer it for you!
Have a great week, friends!
Have a great week, friends!
Carrie || Thirty Eighth Street


Another gorgeous makeover. I love the contrast and you always find such interesting pieces to transform.
ReplyDeleteThis desk was given to me by a friend. I loved that it had curved around. It was calling for something different and fun! Thanks, Debra!
DeleteThis technique really made the desk such an interesting piece. I love how unusual it is and the black and white are such a bold combination. It's stunning!
ReplyDeleteBlack and white is my favorite combo! Thanks so much for stopping by, Jenny! Have a great week!
DeleteBeautiful.
ReplyDeleteThanks for stopping by!
DeleteWhat a gorgeous piece! Love the black and white, so pretty. Sharing on FB & Twitter. Thank you for sharing on Merry Monday! Have a great week!
ReplyDeleteKim
Thank you for sharing our desk on your social media channels! Always a pleasure to visit you each week! Thanks again!
DeleteIt's really cool the way that turned out! I've never seen anything like it. Definitely want to try it out sometime. Thanks for stopping by the Family Joy Link Party!
ReplyDeleteSammy @ sammyapproves.com
I hope you'll give this technique a try! Thanks, Sammy!
Deleteoh my goodness! I love that!
ReplyDeleteYay! It's kind of funky, right?! Thanks, Jessica!
DeleteWHat a beautifully unquie piece!! I need to find a something to try this with :) Thanks for sharing at Family Joy Blog linky party!
ReplyDeleteIf you give the technique a try, I'd love to see yours afterwards! Thanks, Crystal!
DeletePinned this for future reference. Visiting from Up To Date Interiors blog party!
ReplyDeleteThanks for stopping by! I hope you'll be brave and try our technique sometime in the future!
DeleteThat turned out beautiful! I'm going to have to try this technique on my next piece. Love it!
ReplyDeleteI'm so glad that you like it! I'd love to see yours when you're all finished!
DeleteIt certainly looks like ART to me! And to think someone was going to throw it away!
ReplyDeleteTHANK YOU, Mary for your sweet words! I kind of think it looks like art too! ;)
DeleteThis looks awesome. Thanks for sharing with me at Family Joy Blog Link Up Party this week!
ReplyDeleteThank you, Charlene!!
DeleteThis is so beautiful! What a fabulous technique!
ReplyDeleteThanks so much, Sam! Anybody can do this, it was that easy! :)
DeleteStunning! Simply stunning!
ReplyDeleteThank you, Julie! It's different... I'm glad you liked it! :)
DeleteYou might not be able to draw, but you sure can paint and photograph! Some of your demo photos are framing-worthy. (I made that up, but I mean it!)
ReplyDeleteThanks for making my day, Christine!
Delete